概要
Google Map API は Google Map Platform として生まれ変わりました
API も整理され用途に応じてプラットフォームが用意されています
今回は各プラットフォームで用意されている API を試してみました
無料枠でできる範囲ですが Google Map Platform は有料のサービスになっているのでご注意ください
環境
- macOS 10.14
- Google Map Platform (2018/10/25)
Google Map Platform の有効化
ここから登録します
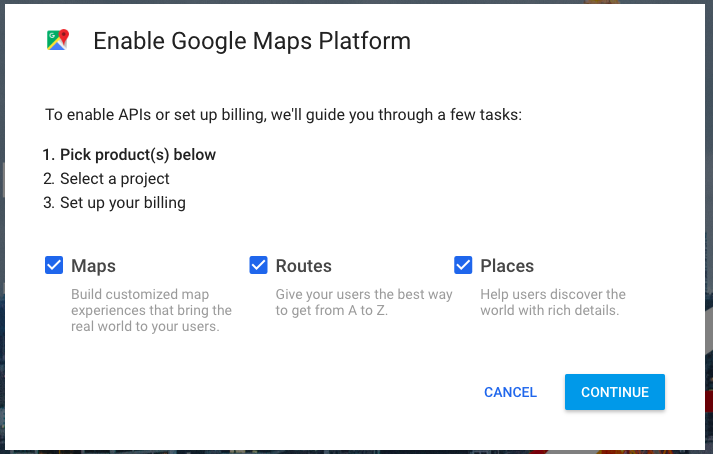
Google Map Platform には「Maps」「Routes」「Places」という 3 つの機能に分類されています
とりあえずすべての API を有効化しましょう
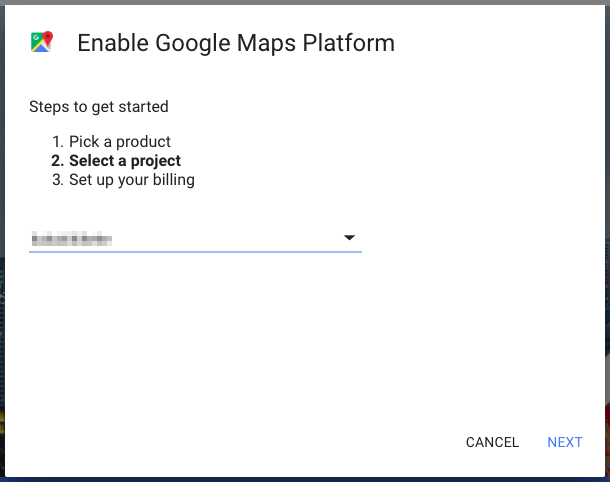
次にプロジェクトを選択します
無料枠はありますが Google Map Platform は有料サービスなのでプロジェクトも請求可能なプロジェクトを選択しましょう
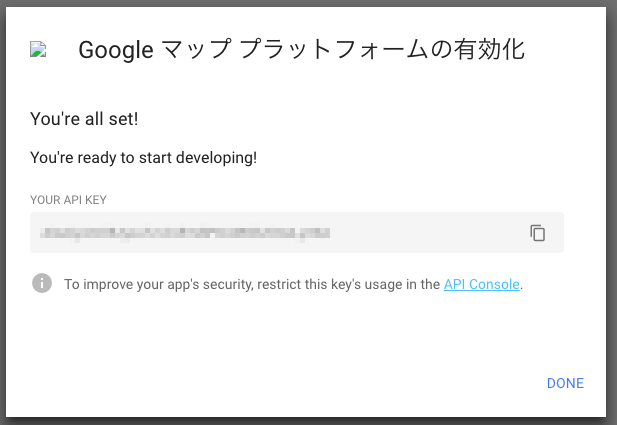
API が有効化するとキーが発行されるのでメモしておきましょう
Maps Javascript API を使ってみる
Maps の Javascript API を使ってみます
Javascript から API をコールして Web サイトなどに地図を埋め込むことができます
チュートリアルにサンプルがあるので動かしてみます
- vim maps.htm
<!DOCTYPE html>
<html>
  <head>
    <title>Simple Map</title>
    <meta name="viewport" content="initial-scale=1.0">
    <meta charset="utf-8">
    <style>
      #map {
        height: 100%;
      }
      html, body {
        height: 100%;
        margin: 0;
        padding: 0;
      }
    </style>
  </head>
  <body>
    <div id="map"></div>
    <script>
      var myLatLng = {lat: 35.6811716, lng: 139.7648629};
      var map;
      function initMap() {
        map = new google.maps.Map(document.getElementById('map'), {
          center: myLatLng,
          zoom: 15
        });
        var marker = new google.maps.Marker({
          position: myLatLng,
          map: map,
          title: 'Hello World!'
        });
      }
    </script>
    <script src="https://maps.googleapis.com/maps/api/js?key=xxxxxxxxxxxxx&callback=initMap"
    async defer></script>
  </body>
</html>- open maps.html
key=xxxxxxxxxxxxx の部分は先程取得した API Key を入力してください
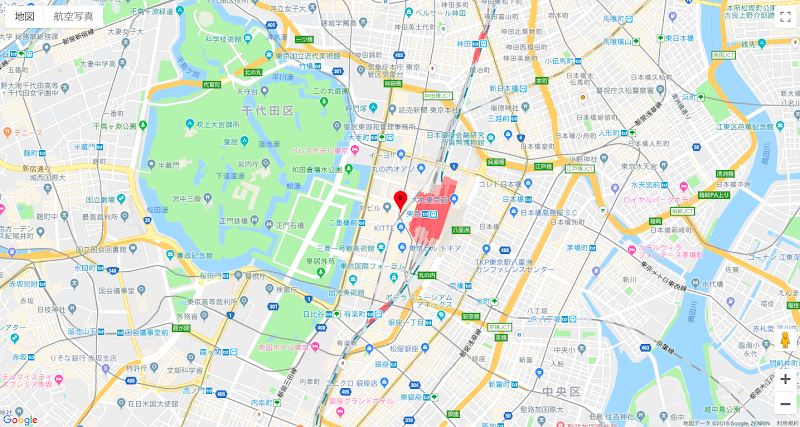
これだけで Google Map アプリを Web 上に表示できます
特にピンなどは立てず単純に地図を表示しているだけです
やっていることは単純で <div id="map"></div> のところに Maps API をコールした結果を埋め込んでいるだけです
Maps API から結果が返ってくると initMap が呼ばれその内容に応じて初めに表示する地図の内容を変更します
center は地図が表示されたときの画面中央に来る座標です
座標情報は Google Map などを使って確認することが可能です
サンプルは東京駅の座標です
zoom はマップを表示した際の初期の拡大率を設定できます
値は大きくなればなるほど拡大されます
拡大率と値の関係は以下の通りです
- 1: World -> 世界地図全部が見える
- 5: Landmass/continent -> 大陸全体が見えるくらい拡大
- 10: City -> 都市全体が見えるくらい拡大
- 15: Streets -> 道が見えるくらい拡大
- 20: Buildings -> 建物名が見えるくらい拡大
Directions API を使ってみる
今度は Routes の Directions API の機能を使ってみます
経路をマップ上に表示することができます
まずスタートとゴールをもとに経路情報を取得します
curl 'https://maps.googleapis.com/maps/api/directions/json?origin=Disneyland&destination=Universal+Studios+Hollywood&key=xxxxxxxxxxxxx'
すると JSON 情報がずらーっと取得できると思います
デフォルトだと車での経路情報になります
他にも mode があり driving, walking, bicycling, transit などが指定できるようです
出発点 (origin) と行き先 (destination) を自然言語で指定できるのは Directions API を使う上で嬉しいポイントかなと思います
応用: Maps Javascript API + Directions API で経路を Web 上に表示する
Directions API は単純に JSON を取得するだけです
もしマップ上に経路を表示したい場合は Maps Javascript API と連携します
他もそうですが可視化するには基本的には Maps のどれかと連携する必要があります
ここのサンプルを紹介します
- vim maps_directions.html
<!DOCTYPE html>
<html>
  <head>
    <meta name="viewport" content="initial-scale=1.0, user-scalable=no">
    <meta charset="utf-8">
    <title>Directions Service</title>
    <style>
      #map {
        height: 100%;
      }
      html, body {
        height: 100%;
        margin: 0;
        padding: 0;
      }
      #floating-panel {
        position: absolute;
        top: 10px;
        left: 25%;
        z-index: 5;
        background-color: #fff;
        padding: 5px;
        border: 1px solid #999;
        text-align: center;
        font-family: 'Roboto','sans-serif';
        line-height: 30px;
        padding-left: 10px;
      }
    </style>
  </head>
  <body>
    <div id="floating-panel">
    <b>Start: </b>
    <select id="start">
      <option value="chicago, il">Chicago</option>
      <option value="st louis, mo">St Louis</option>
      <option value="joplin, mo">Joplin, MO</option>
      <option value="oklahoma city, ok">Oklahoma City</option>
      <option value="amarillo, tx">Amarillo</option>
      <option value="gallup, nm">Gallup, NM</option>
      <option value="flagstaff, az">Flagstaff, AZ</option>
      <option value="winona, az">Winona</option>
      <option value="kingman, az">Kingman</option>
      <option value="barstow, ca">Barstow</option>
      <option value="san bernardino, ca">San Bernardino</option>
      <option value="los angeles, ca">Los Angeles</option>
    </select>
    <b>End: </b>
    <select id="end">
      <option value="chicago, il">Chicago</option>
      <option value="st louis, mo">St Louis</option>
      <option value="joplin, mo">Joplin, MO</option>
      <option value="oklahoma city, ok">Oklahoma City</option>
      <option value="amarillo, tx">Amarillo</option>
      <option value="gallup, nm">Gallup, NM</option>
      <option value="flagstaff, az">Flagstaff, AZ</option>
      <option value="winona, az">Winona</option>
      <option value="kingman, az">Kingman</option>
      <option value="barstow, ca">Barstow</option>
      <option value="san bernardino, ca">San Bernardino</option>
      <option value="los angeles, ca">Los Angeles</option>
    </select>
    </div>
    <div id="map"></div>
    <script>
      function initMap() {
        var directionsService = new google.maps.DirectionsService;
        var directionsDisplay = new google.maps.DirectionsRenderer;
        var map = new google.maps.Map(document.getElementById('map'), {
          zoom: 7,
          center: {lat: 41.85, lng: -87.65}
        });
        directionsDisplay.setMap(map);

        var onChangeHandler = function() {
          calculateAndDisplayRoute(directionsService, directionsDisplay);
        };
        document.getElementById('start').addEventListener('change', onChangeHandler);
        document.getElementById('end').addEventListener('change', onChangeHandler);
      }

      function calculateAndDisplayRoute(directionsService, directionsDisplay) {
        directionsService.route({
          origin: document.getElementById('start').value,
          destination: document.getElementById('end').value,
          travelMode: 'DRIVING'
        }, function(response, status) {
          if (status === 'OK') {
            directionsDisplay.setDirections(response);
          } else {
            window.alert('Directions request failed due to ' + status);
          }
        });
      }
    </script>
    <script async defer
    src="https://maps.googleapis.com/maps/api/js?key=xxxxxxxxxxxxx&callback=initMap">
    </script>
  </body>
</html>- open maps_directions.html
少し長いですがそこまで難しいことはしていません
ポイントは google.maps.DirectionsService で JSON 情報を取得し google.maps.DirectionsRenderer でマップ上に経路情報を表示します
google.maps.DirectionsRenderer は google.maps.DirectionsService から取得したレスポンス情報をそのまま使えるようになっています (directionsDisplay.setDirections(response))
実際に経路情報を取得部分は directionsService.route になっており travelMode は 'DRIVING' になっています
あとは出発点と行き先を選択できるセレクトボックスの状態を監視して値が変化したら再度 DirectionsService を使って経路情報を取得するようにするだけです (document.getElementById('start').addEventListener('change', onChangeHandler))
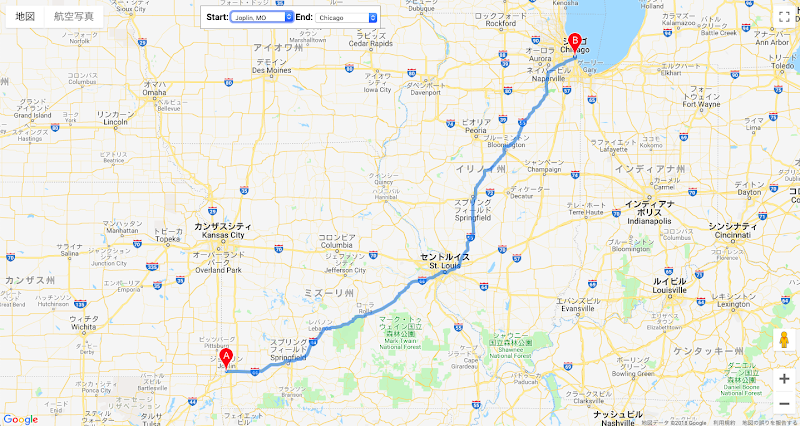
テキスト情報を使って通知などで使う場合には Directions API だけでも十分かなと思います
Place Details API を使ってみる
最後に Place の Place Details API を使ってみます
この API は placeid と呼ばれる場所を特定する ID をもとにその場所の詳細情報を取得することができます
curl 'https://maps.googleapis.com/maps/api/place/details/json?placeid=ChIJN1t_tDeuEmsRUsoyG83frY4&fields=name,rating,formatted_phone_number&key=xxxxxxxxxxxxx'
サンプルは Google の本社の情報を取得しています
{
   "html_attributions" : [],
   "result" : {
      "formatted_phone_number" : "(02) 9374 4000",
      "name" : "Google",
      "rating" : 4.2
   },
   "status" : "OK"
}
Directions API 同様テキスト情報として取得できます
Maps Javascrip API と組み合わせてマップ上に表示したい場合はこの辺りを参考にしてみると良いかと思います
最後に
Google Map Platform の各プラットフォームの API を 1 つずつですが試してみました
経路や場所のテキスト情報を Routes や Places を使って取得して、それらを可視化したい場合に Maps を使うのが基本的な使い方だと思います
今回紹介した API はほんの一部です
Geolocation API や Street View API もあるので興味があれば調べてみてください
公式のドキュメントがかなり充実しているので特につまづくことなく使えると思います
おそろく強力な API なので使い方を知っておいて損はないかなと思います
作成された API Key は使用しないのであれば削除しておくことをおすすめします
0 件のコメント:
コメントを投稿